


Welcome to the engaging world of 3D wooden puzzles and their solving techniques. If you're ready to begin, you'll find a satisfying challenge that hones your abilities. As you assemble each component, you'll improve fine motor coordination and strengthen problem-solving skills. Stay patient and maintain a positive attitude — the sense of accomplishment after finishing a well-crafted wooden model makes the effort worth it. Let’s look at how to start with 3D wooden puzzle solutions and enjoy the process.
Key Takeaways: 3D Wooden Puzzle Solutions
- Start with a beginner-level puzzle to build confidence and skills. Choose puzzles with 15-99 pieces for a manageable challenge.
- Before you begin, organize the pieces. Arrange them by size, shape, or type to simplify assembly and make the experience more enjoyable.
- Be patient when dealing with stuck pieces. Gently wiggle them free and check for misalignment before forcing them.
- Use minimal glue for added stability. A small drop on joints can enhance the puzzle's integrity without affecting its appearance.
- Engage with online communities for support and tips. Sharing experiences can enhance your puzzle-building journey.
What Are 3D Wooden Puzzles: Basic Types

Image Source: Jonathan Kemper from Unsplash
3D wooden puzzles are detailed wooden models that you put together to form three-dimensional structures. They’re available in many styles and designs, each presenting its own level of challenge and visual charm. Here are some basic types you might encounter:
- Mechanical models
- Vehicles
- Architecture
- Animals
- Marble runs
These categories showcase the creativity and craftsmanship involved in designing 3D wooden puzzles. Each type can provide a different experience, whether you're building a stunning architectural piece or a fun marble run.
When it comes to materials, most 3D wooden puzzles use high-quality hardwoods like maple and birch. These woods are popular for their strength, durability, and attractive grain. The wood is often kiln-dried to remove excess moisture, ensuring that the pieces maintain their shape over time.
Manufacturing methods can vary significantly between puzzles. Artisanal puzzles are crafted with care, where skilled artisans select sustainable wood, cut, shape, and sand each piece to create interlocking designs. They often use precision carving or laser cutting to enhance both functionality and visual appeal. In contrast, mass-produced puzzles typically rely on cost-efficient materials like paperboard. These puzzles often feature a photograph glued to cardboard, cut using hardened steel blades and hydraulic presses for precision.
Typical Difficulty Levels and Target Audiences
3D wooden puzzles come in various difficulty levels, catering to different age groups and skill sets. Here's a quick overview:
| Difficulty Level | Piece Count | Recommended Age Group | Estimated Completion Time |
|---|---|---|---|
| Beginner | 15-99 pieces | Around 8 years old | 1-3 hours |
| Easy | 100-200 pieces | Older children (10+) | 3-6 hours |
| Medium | 200-500 pieces | Ages 14 and up | 6-10 hours |
| Hard | 500-1000 pieces | Experienced builders | 10-14 hours |
| Expert or PRO level | 1000+ pieces | Adults 18 and older | 14-16+ hours |
This table helps you choose the right puzzle based on your experience and the time you want to invest. Whether you're a beginner or an expert, there's a 3D wooden puzzle waiting for you!
Why People Love 3D Wooden Puzzles?

Image Source: Roger Ce from Unsplash
Cognitive and Educational Benefits
You might be surprised to learn that assembling 3D wooden puzzles offers significant cognitive benefits. Engaging with these puzzles can enhance your spatial reasoning and geometry skills, which are crucial for success in STEM subjects. Here’s a quick look at some documented cognitive benefits:
| Cognitive Benefit | Description |
|---|---|
| Spatial Reasoning and Geometry | Assembling puzzles enhances spatial transformation skills, leading to better academic performance. |
| Problem-Solving and Critical Thinking | Engaging with puzzles fosters problem-solving skills as you hypothesize, test, and adjust your strategies. |
| Attention Span and Executive Function | Regular puzzle assembly improves sustained attention and executive function, key predictors of academic success. |
| Working Memory | Puzzles enhance working memory through exercises that require remembering piece placements and patterns. |
For beginners, these puzzles provide a multisensory experience that boosts cognitive development. They help you build connections between physical experiences and abstract concepts, improving your understanding of size, shape, and spatial relationships.
Therapeutic and Stress-Relief Effects
3D wooden puzzles also serve as a fantastic way to unwind. Many people find that focusing on a puzzle helps them escape from daily stressors. The repetitive motion of fitting pieces together can be meditative, allowing you to clear your mind. Plus, solving puzzles together with friends or family fosters teamwork and communication, making it a great bonding activity.
Decorative and Collectible Value
Finally, let’s talk about the aesthetic appeal of 3D wooden puzzles. Many of these puzzles are crafted from high-quality materials and feature unique designs. Once completed, they can serve as beautiful decorative pieces in your home. Collectors appreciate the artisanal quality and craftsmanship, making these puzzles not just a fun activity but also a valuable addition to any collection. The tactile experience and visual appeal enhance their collectible nature, as they can be displayed as art.
In short, whether you’re a beginner or an experienced builder, 3D wooden puzzles offer a blend of cognitive benefits, stress relief, and decorative charm that keeps enthusiasts coming back for more!
Common Problems Builders Face

Image Source: Grant Durr from Unsplash
When you start solving 3D wooden puzzles, you might run into a few common problems. Don’t worry; these issues are part of the learning process!
Stuck or Jammed Pieces
A common frustration is pieces that get stuck or jammed, often caused by removing parts from their sheets too forcefully. Tugging can snap tabs or break small connectors. Work slowly and wiggle pieces out gently. If something resists, inspect the part for burrs, leftover sprue, or misaligned sections before applying more force. Taking a calm, patient approach usually prevents damage.
Pieces that don’t Fit as Expected
You might find that some pieces don’t fit as you expected. This can occur due to swollen wood or rough edges. Before forcing a piece into place, do a test fit. If it doesn’t slide in smoothly, inspect it for any imperfections. Sometimes, a quick sanding can help smooth out rough edges, making assembly easier.
Missing or Broken Parts
Missing or broken parts can be a real headache. Builders of 3D wooden puzzle kits do encounter these issues, but the good news is that you can often get replacements at no extra cost. If you notice something’s missing, reach out to the manufacturer. They usually have a system in place to help you out.
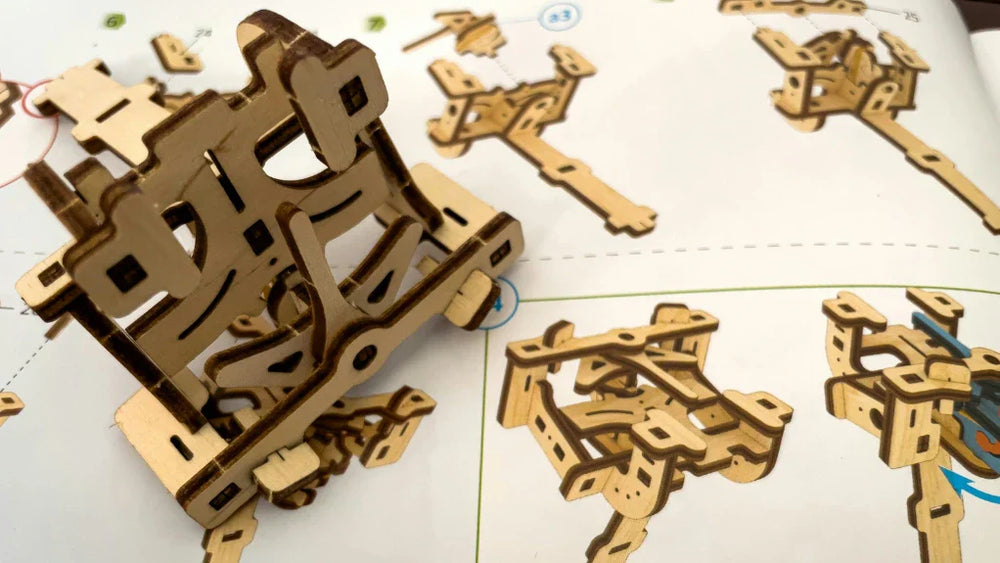
Confusing Instructions or No Manual
Lastly, confusing instructions can throw you off track. Many builders forget to read the complete instruction booklet before starting. This can lead to installing components incorrectly. Make sure to familiarize yourself with the overall architecture of the puzzle before diving in. If you find the instructions unclear, consider looking for online tutorials or forums where fellow builders share tips.
Knowing these common issues ahead of time helps you approach your first 3D wooden puzzle with confidence. Treat each difficulty as a chance to learn and improve.
Practical Step-by-Step Solutions
Before You Start: Preparation Checklist
Take a moment to get ready before you begin your 3D wooden puzzle. Use this checklist to stay organized and protect your pieces:
- Sort pieces by size, shape, or assembly number to keep them easy to find.
- Place small parts in trays, shallow boxes, or muffin tins so they don't get lost.
- Spread pieces out on a clean, flat surface with plenty of room to work.
- Make sure your workspace is stable and large enough to hold the puzzle and tools.
- Use a cutting mat or thick cardboard to protect the table and cushion delicate parts.
- Keep tools nearby but off to the side of the main assembly area to avoid accidents.
- Wash and dry your hands before handling parts to prevent oils or moisture transfer.
- Hold parts by their thicker areas when possible to avoid snapping thin tabs.
How to Read and Interpret Laser-Cut Parts
Understanding your puzzle pieces is crucial for a smooth assembly. Here are some tips to help you interpret laser-cut parts effectively:
- Prefer markers over paint. Paint can change dimensions and hinder friction fits; fine-tip or alcohol-based markers give precise, thin coverage.
- Pick a simple color scheme. Limiting yourself to two or three colors helps keep the model cohesive and makes individual parts stand out.
- Color before you assemble. It’s far easier to reach every surface before parts are locked together, so finish any coloring first.
Safe Ways to Free Stuck Pieces
If pieces become stuck, stay calm and follow these steps to free them without damage:
- Wiggle gently: Rock the piece back and forth with light pressure to loosen it.
- Inspect before forcing: Look for burrs, leftover sprue, or misaligned tabs that might be blocking movement.
- Use a slender tool carefully: If needed, employ a thin, flat tool (like a craft knife blade, micro-spatula, or flathead screwdriver) to nudge the connection—work slowly and avoid prying at an angle that could split the wood.
- Apply focused sanding if required: If a small bit of material is catching, lightly sand the contact point with fine-grit sandpaper until it fits smoothly.
- Reassess fit often: Test the piece frequently as you work to avoid removing more material than necessary.
Work patiently and deliberately—gentle, incremental adjustments protect parts and preserve the model.
Sanding, Trimming and Fitting Without Damaging Aesthetics
When parts need adjustment for a snug, clean fit, follow these steps to preserve the model’s look:
- Smooth rough edges with fine-grit sandpaper or a sanding block. Work lightly and check frequently to avoid over-smoothing.
- For tabs that are too loose, increase the tab thickness in the design file so joints hold more firmly.
- If pieces are too tight, widen the cut slightly by changing kerf compensation (or remove a hair’s breadth of material with a file or very fine sandpaper) until parts slide together without forcing.
- Sand or trim only where necessary and blend any exposed edges so the finish remains consistent.
- When possible, perform adjustments on the inside or less visible faces of parts to keep visible surfaces pristine.
Temporary Fixes vs. Permanent Repairs
Sometimes, you might need to make quick fixes. Temporary fixes can help you continue working, but aim for permanent repairs when possible. Use glue sparingly to avoid excess that could affect aesthetics.
How to Handle and Replace Small Broken Teeth or Tabs
If you break a small tab or tooth, don’t worry! You can often replace it. Here’s what to do:
- Identify the exact piece needed and specify its location clearly.
- Reach out to the manufacturer with all relevant information for assistance.
When to Contact the Manufacturer and What to Ask for
If you discover problems such as missing or damaged parts, reach out to the manufacturer. Keep the original box and any packaging available, since they may ask for details shown there. Provide clear identifying information: the UPC/barcode, item or model number, puzzle title, manufacturing lot code, and production date if printed. Describe the exact part you need—give its location or number, or compare it to a grid/coordinate if available—so they can quickly identify and replace the correct piece.
Follow these steps and the rest of the practical tips above, and your first 3D wooden puzzle will be much more manageable and enjoyable.
Advanced Techniques for Perfect Assembly

Applying Minimal Glue for Structural Integrity
When you’re assembling your 3D wooden puzzle, you might wonder about using glue. While many puzzles fit together snugly without it, a little glue can enhance stability. Just remember to use it sparingly! Here’s how to do it effectively:
- Pick an appropriate adhesive: Use wood glue or another clear-drying adhesive so the finish stays clean and attractive.
- Use sparingly: A very small drop at the joint is usually sufficient. Excess glue can cause a mess and interfere with fit.
- Press and hold: After applying glue, press the parts together for several seconds to ensure a solid bond and minimize squeeze-out.
By following these steps, you’ll maintain the aesthetic appeal of your puzzle while ensuring it stays intact.
Preventing Humidity and Warping
Humidity can be a real enemy for your wooden puzzles. Excess moisture can cause warping, which makes assembly difficult and can ruin your hard work. Here are some effective strategies to keep your puzzle in top shape:
- Store puzzles in a dry place: Avoid areas with high humidity, like bathrooms and kitchens. Instead, opt for a cool, dry room.
- Use silica gel packs: Place these inside your storage boxes to absorb any excess moisture. They’re a simple yet effective way to protect your puzzle.
- Check your environment: If you live in a humid area, consider using a dehumidifier in your home. This can help maintain a stable environment for your wooden treasures.
By taking these precautions, you’ll ensure that your 3D wooden puzzle remains in perfect condition, ready for assembly whenever you are!
Tools and Supplies Checklist
Essential Tools Every Builder Should Own
When you start your journey with 3D wooden puzzles, you might wonder what tools you really need. The great news is that modern puzzles are designed to be assembled using just the pieces in the kit. You can often complete them with just your hands! However, having a few handy tools can make the process smoother and more enjoyable. Here’s a list of essential tools you might consider:
- Hobby knife: A sharp hobby knife with extra blades can help you carefully trim any rough edges.
- Fine sandpaper: This is perfect for smoothing out any imperfections on the puzzle pieces.
- Wax or beeswax: Applying a bit of wax can ensure smooth movement in gear mechanisms, especially in mechanical models.
- Good lighting: Make sure you have adequate lighting from above or the side to avoid shadows that can obscure your view.
These tools can enhance your experience and help you tackle any minor issues that arise during assembly.
Optional Precision Tools for Advanced Builders
If you’re looking to take your puzzle-building skills to the next level, consider investing in some optional precision tools. These can help you achieve a more refined finish and tackle more complex puzzles with ease:
- Tweezers: These can be incredibly useful for handling small pieces, especially when you need to place them in tight spots.
- Precision scissors: For those intricate cuts, a pair of precision scissors can provide the accuracy you need.
- Clamps: If you’re working on larger models, clamps can hold pieces together while the glue dries, ensuring a strong bond.
- Magnifying glass: This can help you see fine details and ensure everything fits perfectly.
With these tools in your arsenal, you’ll be well-equipped to handle any 3D wooden puzzle challenge that comes your way. Happy puzzling!
Building your first 3D wooden puzzle can be a fun and rewarding journey! Remember, practice makes perfect. As you tackle more puzzles, you'll notice your skills improving. Don't hesitate to share your experiences with others. Engaging in online communities can help you connect with fellow builders, celebrate successes, and gain valuable tips.
As you gain confidence, consider exploring more complex puzzles. Here are some resources to help you along the way:
- Tips for buying your first 3D puzzle
- A guide to choosing 3D wooden puzzles
- Benefits of wooden educational puzzles
Enjoy the process, and happy puzzling! 🧩
FAQ
What age is suitable for 3D wooden puzzles?
Most 3D wooden puzzles cater to various age groups. Beginners can start around 8 years old, while more complex puzzles are suitable for teens and adults. Always check the recommended age on the puzzle box for guidance.
How long does it take to complete a 3D wooden puzzle?
Completion time varies based on the puzzle's difficulty. Simple puzzles may take 1-3 hours, while more complex ones can take 10-16 hours or more. Enjoy the process, and don’t rush!
Can I paint my 3D wooden puzzle?
Yes, you can paint your puzzle! However, use magic markers instead of paint to avoid affecting the fit of the pieces. Color them before assembly for the best results.
What should I do if I lose a piece?
If you lose a piece, contact the manufacturer for a replacement. Most companies have systems in place to help you get missing parts at no extra cost.
Are there any tips for beginners?
Absolutely! Start with a beginner-level puzzle, organize your pieces, and read the instructions thoroughly. Take your time, and remember that patience is key to enjoying the experience!